More Anatomy Tips By Moni158

More anatomy tips by moni158
More Posts from Arttuti and Others
apparently ppl don’t know about waifu2x??? despite its… concerning name it’s literally the most convenient website i’ve ever come across as an artist
it allows you to resize artwork without it becoming pixellated. this is a MASSIVE help if you, for example, make lineart too small or something. it works best with things that 1. have no textures 2. have smooth lines 3. have cel shading, but it still works really damn well for things that don’t fit that profile
here’s an example:

normal size

2x in paint

2x in waifu2x
so like, there’s that. go wild

So I got a lot of messages after my first post asking me to explain layers, so I have put together a cheat sheet of the different layer types. The quickest way to become awesome with layers is to know exactly what each one does. Once again, I’m no expert, and these are just my personal definitions, so please try these out for yourself! LONG POST BELOWWW THE LAYERS CHEAT SHEET PART ONE: 1. NORMAL: Aw yeah you know all about this layer its just your average layer 2 DISSOLVE: This mode “dissolves” some pixels, allowing the lower layer to show through. very pixel-y. Reducing opacity makes it dissolve more. ________ 3. DARKEN: Now the difference between darken and multiply are a little confusing, so I will explain them together. MULTIPLY is more of a glaze, while DARKEN favors the darks on all layers. So if you have a darken layer on, it tend to reduce/remove the lighter tones on the layer if there are darker tones below it, while darkening the darks. 4. MULTIPLY: A glaze that darkens the color of the layer below. It is great for shading. Reduces whites. 5. COLOR BURN: “Burns” the lower layer favoring a more saturated look. Marks made over white are not preserved. 6. LINEAR BURN: “Burns” the lower layer, with a little less saturation than color Burn. Also will preserve colors over white. 7. DARKER COLOR: I tend to avoid this puppy cause it does not darken on the RGB channel. (feel free to try him though!) ______ 8. LIGHTEN: Lightens the colors below. Favors lighter colors on lower layers. 9. SCREEN: Lightens the colors below, but much closer to the “glaze” analogy as above. Reduces blacks. 10. COLOR DODGE: Often used for magic-y effects, color dodge bumps up saturation and is very bright. 11. LINEAR DODGE: Much like color dodge, but less saturation. 12. LIGHTER COLOR: Once again, this is an outside RGB channel layer, so I don’t really use this. As you probably have noticed, the second two groups are opposites, so if you have a good handle on one, you probably know exactly what the second group does! I will do the remaining groups next week as they do not follow this pattern. Thanks! drawmaevedraw.tumblr.com EDIT: Part two here: Photoshop Layers Part Two!!
How to other eye
ALRIGHT, so, I know a lot of people have trouble making eyes match. Yesterday I found out a way to make it significantly easier! Here’s a small guide.

Well, first of all, you have your face. mark where the eyes should be on it.

Then mark the corners of the eyes and go over the middle again, to make the next step easier

Alright, I know it sounds a bit crazy, but draw this shape, trying to make it as symmetrical as you can.

Draw the eyes using that shape as a guide and TA-DA! They match! For different eye shapes you tweak the angle of the two guide lines.

And it also helps with angles where the size and shape of the eye is distorted, you just put it in perspective.

I think the theory behind it is that the thing that makes it hard to make the eyes match is the angle of the corners, and this type of guideline helps make them even, which makes the eyes look symmetrical. Welp, here it is! I hope it helps someone!
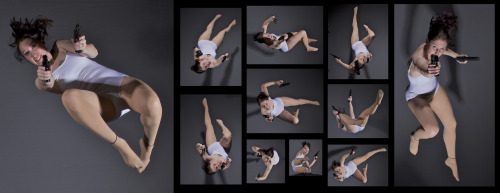
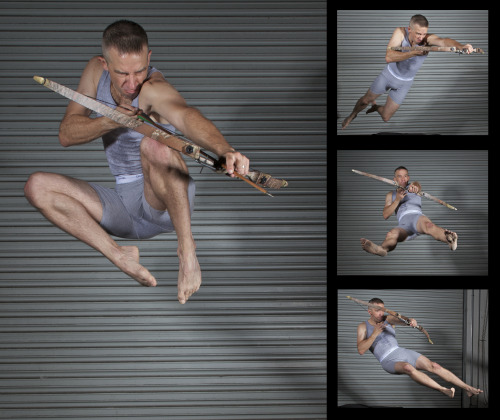
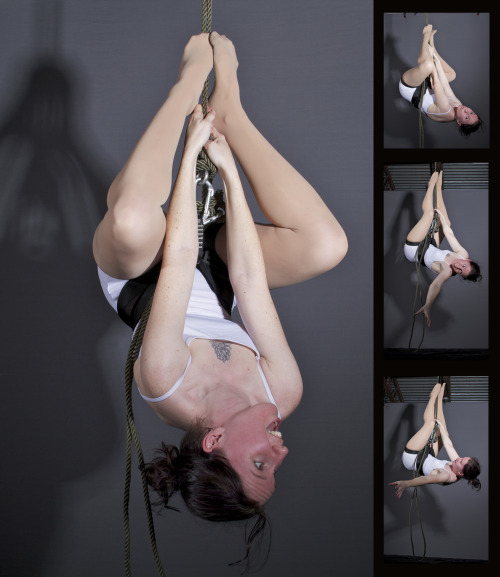
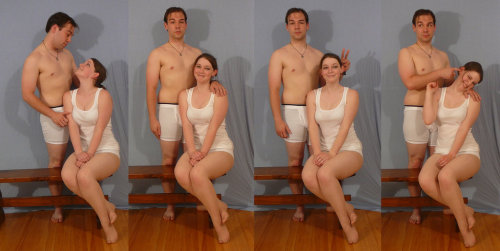
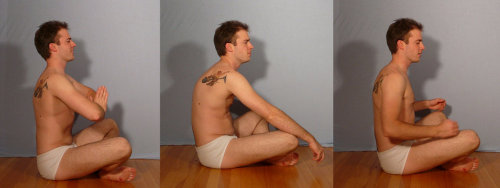
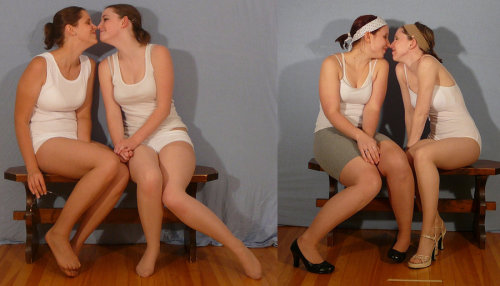
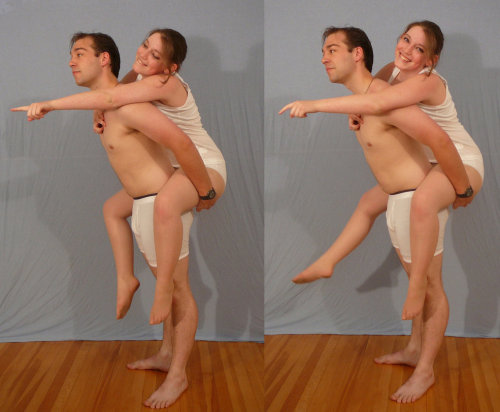
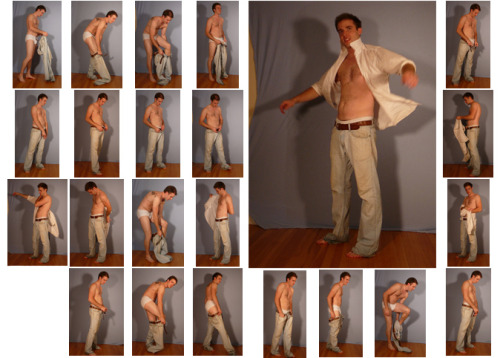
SenshiStock’s gallery consists of millions of pictures that are free to use as reference.
General Drawing Poses Sit and Kneel Dramatic and Reaching Drawing Poses Magic and Hogwarts Drawing Poses Staff Weapon Pose Reference Hammer, Axe and Bat Pose Reference Sword Weapon Drawing Reference Small Bladed Weapon Pose Reference Gun Weapon Pose Reference Bow and Arrow Archery Stock Foreshortening and Perspective Poses Dynamic Flying Falling Action Poses Deafeated or Laying Drawing Poses Magic Crystal Magical Girl Wand Weapon Transformations and Dance Cards Back Pose Reference Pin Up Inspired Poses for Drawing Performances Poses Life in General Poses Fights and Fighting Pose Reference Leaning Poses Classic Sailor Senshi Poses Wings Sailor Moon Villains Pairs Romance or Couples Pose Reference All the Male Stock Hanging Stock Drawing Reference Three or More Groups Instruments Mirrors Whip Technobabble
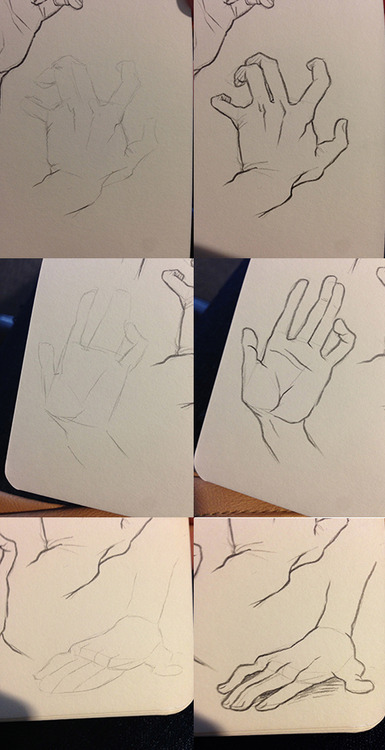
hi! you draw really nice hands, could you give some tips/make a tutorial?
sure!! this is quick and i dont have much of a method so?
i kinda start out with a box shape for the palm and make some tic marks to plan out where the fingers go
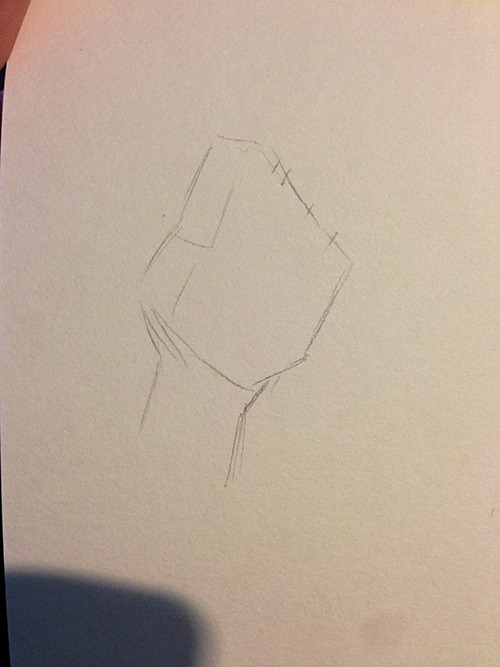
then box out some fingers
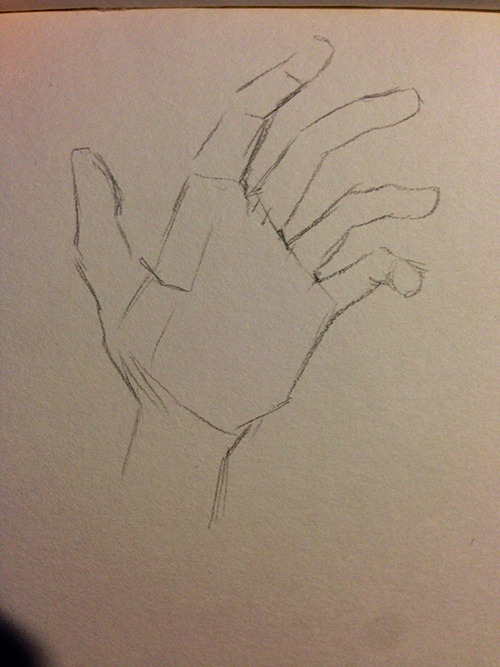
and darken out the details!
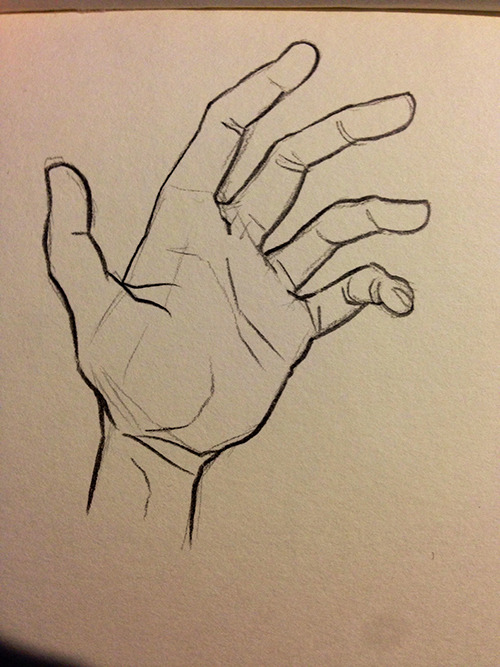
here’s some more examples too!! i always like to exaggerate the position of the thumb and pinky to make the pose of the hand more interesting?? give it more character? it’s a hand
![WATCH: Ingenious Hack For Sketching With Two Point Perspective Using An Elastic String [video]](https://64.media.tumblr.com/0b13ff3d75c562f8d4f738c467f901c5/tumblr_oej2mru2ss1rte5gyo1_500.gif)
![WATCH: Ingenious Hack For Sketching With Two Point Perspective Using An Elastic String [video]](https://64.media.tumblr.com/472a041782e1e2136987ad48fbacd0f0/tumblr_oej2mru2ss1rte5gyo2_r1_500.gif)
WATCH: Ingenious Hack for Sketching with Two Point Perspective Using an Elastic String [video]

I see a lot of beginner artists missing the mark on drawing profile views, particularly on eyebrows & eyes—I hope this helps! 💖 Obviously you can stylize things however you want, but it’s important to reference & understand how things work in real life before attempting style if you’re concerned at all about believability.


Anonymous said: Thanks for your tutorials, they are so simple to understand even for someone quite dumb about arts (me)! If you’ll have time and mood, can you, please, create tutorial for making lineart. I’m fairy bad at that.
Thank you! That’s really great to hear that! :D If you browse my gallery you’ll notice that lineart isn’t something I use often (so that’s why I digged in my old drawings a bit to get some examples u_u) Anyway, I think there are more competent and skillful people out there whom you can ask about it but this is what I do. Just study other artists’ art, it’s helpful. Try to use different brushes and see what works best. Also things I think are important: ⁎ use bigger canvas (mistakes are less visible) ⁎ don’t use smal brushes with smooth but very defined edges because the lines will seem very jerky and ragged ⁎ vary thickness of your lines to make everything more dynamic but try to make it natural (it’s a little bit like calligraphy) ⁎ practice! lines will be smooth and flowy if you make your hand confident: - draw traditionaly - excercise with drawing straight lines and curves - make quick, long strokes instead of drawing short lines (they’ll look sketchy) or doing painfully precise, slow moves - don’t zoom in too much - turn off the stabiliser (at least sometimes)) (Aaaand… you can always use vector drawing tools as a last resort :))
-
 ladycaitlin0429 liked this · 2 years ago
 -
 dionlutziv liked this · 3 years ago
 -
 nerdyfuturismcookingpatrol liked this · 4 years ago
 -
 gorgeousdecepticon liked this · 4 years ago
 -
 icypolliatea liked this · 4 years ago
 -
 klm-art liked this · 4 years ago
 -
 spiderdetentionaire liked this · 6 years ago
 -
 ravenwolf1132 liked this · 6 years ago
 -
 heartshapedplants liked this · 6 years ago
 -
 natarisaru liked this · 6 years ago
 -
 colourmeinspired reblogged this · 6 years ago
 -
 littlewhitetie liked this · 6 years ago
 -
 sphinx-inix liked this · 6 years ago
 -
 the-night-howler-blog liked this · 7 years ago
 -
 fruityskirt liked this · 7 years ago
 -
 tirnelruin-tutorials reblogged this · 7 years ago
 -
 aestheticexpress reblogged this · 7 years ago
 -
 25reblogs reblogged this · 7 years ago
 -
 aoriginalusename123-blog liked this · 7 years ago
 -
 ragchaser liked this · 7 years ago
 -
 pop4g liked this · 7 years ago
 -
 roseyfeather liked this · 7 years ago
 -
 rosecochonnetduprintemps liked this · 7 years ago
 -
 iamputtyinyourhands-blog liked this · 7 years ago
 -
 bloodlustfox liked this · 7 years ago
 -
nonnami-blog liked this · 7 years ago
-
 redrosethings liked this · 7 years ago
 -
iswearifmyphoneturnsoffagainill liked this · 7 years ago
-
 jingleclarimonde liked this · 7 years ago
 -
 pinkie-on-lsd liked this · 7 years ago
 -
 shoutykankri liked this · 7 years ago
 -
 devilswhoresstuff liked this · 7 years ago
 -
 saltypanther liked this · 7 years ago
 -
 magicalgirlalle reblogged this · 7 years ago
 -
magicalgirlalle liked this · 7 years ago
-
 kanokace liked this · 7 years ago
 -
 strawberryletter-23 liked this · 7 years ago
 -
 art-study-soft-blue-boy reblogged this · 7 years ago
 -
 pppantsu-blog liked this · 7 years ago
 -
 arttuti reblogged this · 7 years ago
