Have Fun W/ This

have fun w/ this
More Posts from Arttuti and Others
Art Help

I redid this list because broken links 💀
General Tips
Stretch your fingers and hands
Art is for fun
Never too late to start/improve
Using a tablet
Editing software: pictures & video
Moodboard resources
Comic pacing
Watercolor
Coloring
Color Theory (not children's hospital)
Resources: coloring things a different color
Gold
Dark Skin undertones
Dark Skin in pastel art
POC Blush tones
Eyes colors
Cohesive Color Palette
Lights and Colors
Human Anatomy
POSE REFERENCES
Wizard Battle poses
Romance poses
Shoulders
Tips for practicing anatomy
Proportional Limbs
Skeletons
Hair Directions
Afro, 4C hair
Cane use
Clothing
Long skirts
Traditional Chinese Hanfu (clothing reference)
CLOTHING REFERENCE
Sewing information
Animals
Horse -> Dragon
Snouts: dogs, cats, wolves, fox
Foot, paw, hoof
More
Drawing references sources
Art tutorial Masterlist
Another art tutorial Masterlist
Inspiration: father recreates son's art
Inspiration: Lights
ART BOOKS
Plants/flowers: North America, Hawaii, Patagonia
Art Cheats
I am so envious of your fabric folds <3 Teach me senpai?
ALL RIGHT I’LL TRY!Note: This is how I personally work with folders, i’m not right neither wrong, different artists have different ways to do the same thing. Remeber to check for more than one as refference!

The shame is HEAVILY influenced by the wind or movement on the character/object, so are the folds that follow the flow of whatever is influencing them!


Always consider the fabric you’re planning to use, a heavy one won’t have as many folds, but will have more bumps, meanwhile thin ones tend to have A LOT of folds and not so many bumps, and often fold over themselfs


If you don’t plan how the object/dynamic/wind whatever will influence the fabric, you may come up with this:


The tip of the arrows will have LESS folds because it’s where the wind is blowing, meanwhile the back of the arrows will have a lot of folds, since it’ll curl and bump on itself!
You can’t just toss folders around without planning how they will be affected, works very similar as hair does!
It ended up so long i really hope it helps omgg ;w;If you want to support me and help me to make more tutorials, you can always tip me! (Not mandatory, don’t feel pressured!)


Anonymous said: Your art is so natural and expressive, I love it! I was wondering how you go about cuddles?? Or just fitting two people together so it’s not awkward or stiff looking, it’s something I’ve struggled with but look to your art to see how you solve it. I was wondering about your thought process when organizing a drawing like that (I hope the English is okay!)
Thanks! ^^ When I read your first question I thought you’re asking about real cuddles :’) Anyway, this is how I go about it, sometimes I alredy have a pose in mind, but then it’s just trying until I get it right. Sometimes I use references. But this technique is really relaxing, I love to draw this way :D Hope it helps!


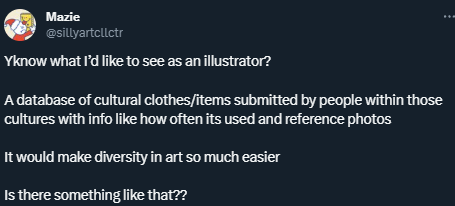
tweet
Something like this would be so colossally helpful. I'm sick and tired of trying to research specific clothing from any given culture and being met with either racist stereotypical costumes worn by yt people or ai generated garbage nonsense, and trying to be hyper specific with searches yields fuck all. Like I generally just cannot trust the legitimacy of most search results at this point. It's extremely frustrating. If there are good resources for this then they're buried deep under all the other bullshit, and idk where to start looking.
Could you give a tutorial on how you do hair? I just looooovvvveeee the way you did rhetts hair & beard
Hey! Thank you so much. I’m not a good teacher, but I’ll give it a shot :)
Step 1: DO NOT TRY TO DRAW EACH HAIR! Draw each bunch of hair but NEVER each hair.
Step 2: Draw a faint outline of the entire portrait using the reference photo:

Step 3: Pick one bunch of hair, and make loose, dark strokes to draw the roots of the hair. Make similar strokes at the other end of the bunch. (Remember, you’re not drawing each strand. You’re essentially drawing shadows). Don’t let them meet. This is important to render the shine in the hair. Let the pencil lift off the paper as you move towards the middle from both ends.

Step 4: Use a paper stump to smudge out the roots and the outer edge of the hair. Make loose strokes, starting from the darkest end towards the centre of the bunch. Let a few strokes run all the way through the centre to make it look like a natural shine. Then use a dark pencil to re-do smaller strokes on both ends of the bunch, to increase the contrast.

Step 5: Treat each bunch separately, and repeat till you cover the full head. To finish off, erase a few highlights from the middle of the bunches, to give a consistent shine, and smudge out the hairline for a more natural shadowed look.

I hope that was useful! Let me know if you want me to give a step by step for the rest of his face too :) - I would be completing this portrait anyway!

-
 doubledyke liked this · 4 weeks ago
 -
 bloosrefblog reblogged this · 4 weeks ago
 -
 peanutgrowls liked this · 4 weeks ago
 -
 immortanozpin liked this · 1 month ago
 -
 capriast reblogged this · 1 month ago
 -
 jabberwockprince liked this · 1 month ago
 -
 darkaac reblogged this · 1 month ago
 -
 sweetpeachyeve reblogged this · 1 month ago
 -
sweetpeachyeve liked this · 1 month ago
-
 phantomblack05 reblogged this · 1 month ago
 -
phantomblack05 liked this · 1 month ago
-
 bitch-what-in-the-ass reblogged this · 1 month ago
 -
 nullhalo liked this · 1 month ago
 -
 sizzlingwhisperskoala liked this · 1 month ago
 -
 arsoniststestimony reblogged this · 1 month ago
 -
 choose-your-own-dentistry liked this · 1 month ago
 -
 aro-spectre reblogged this · 1 month ago
 -
 aghostintheforest liked this · 1 month ago
 -
 antuneater liked this · 1 month ago
 -
 humanshapedtimebomb reblogged this · 1 month ago
 -
humanshapedtimebomb liked this · 1 month ago
-
 elrphant reblogged this · 1 month ago
 -
 tf2fan459 liked this · 1 month ago
 -
 level1cleric liked this · 1 month ago
 -
 sidereon-spaceace reblogged this · 1 month ago
 -
 nice2neetcha liked this · 1 month ago
 -
 luckyrunawaysoul liked this · 1 month ago
 -
salespersonswopgapchartlegislatu liked this · 1 month ago
-
 artsncraftsnrefs reblogged this · 1 month ago
 -
 2dollarstalechips liked this · 1 month ago
 -
 journey-of-a-sub liked this · 1 month ago
 -
 noxernia reblogged this · 1 month ago
 -
 slumberingslothfully reblogged this · 1 month ago
 -
 jules-shall-rule liked this · 1 month ago
 -
 lunasilverhart reblogged this · 1 month ago
 -
 steelshard liked this · 1 month ago
 -
 compugwen liked this · 1 month ago
 -
 tale-of-the-champion liked this · 1 month ago
 -
 psybelle-draws liked this · 1 month ago
 -
 thimmeigh liked this · 1 month ago
 -
 zee liked this · 1 month ago
 -
 adrekiy0 reblogged this · 1 month ago
 -
 desucane reblogged this · 1 month ago
 -
desucane liked this · 1 month ago
-
 lambsoul liked this · 1 month ago
 -
 hiwataris-bitch reblogged this · 1 month ago
 -
 r0b0friend liked this · 1 month ago
 -
 natalici0 liked this · 1 month ago
 -
 arcadecutie reblogged this · 1 month ago
 -
 amazingly-amazing-loser liked this · 1 month ago
