Requested // More Close Ups And Extra Pictures Of Chemistry Revision Cards For AQA C2. And Yes I Did


Requested // more close ups and extra pictures of chemistry revision cards for AQA C2. And yes I did colour in my banners since before I didn’t 💁🏽✨
More Posts from Marathon-notasprint and Others

Organization
How to Take Notes from a Textbook
How to Write Long Papers
Organization Tips
How to Choose the Perfect Planner
Bullet Journaling How-To
Keeping Your Cool
Focus and Energy Management for Students
Sending Emails to Teachers
Waking Up Early
Achieving your full academic potential: Things to Avoid Doing
Study Playlists
College
tips for college freshmen
How to study like a straight A student
College Tips
42 College Tips I Learned Freshman Year
College tips: Advice from a professor
10 Commandments of Dorm Shopping
AN EASY GUIDE TO BE HEALTHY IN COLLEGE
How to Write the Perfect College Essay
COLLEGE SHOPPING LIST
10 Tips for Getting Along With Your College Roommate
High School
33 Things High School Seniors Wish They Knew As Freshmen
Expert nutrition tips for high school athletes
16 Studying Hacks For Finals Week
School Tips
High School Advice
Survive high school with our how-to guide
Back to School: Tips For Surviving High School (Video)
JUNIOR YEAR ADVICE
13 Incredible Back-To-School Hacks You Won’t Believe You Survived Without
Senior Year Advice
Tips for Studying History!
I don’t see a lot of posts about how to effectively study for history classes, so I’m going to give it a shot! Warning: long post coming up!
Practice identifying the significance of something. The entire point of history is to learn the significance of different events and people. I guarantee that at some point you will be asked to state the significance, which is where this comes in handy. Also, knowing how to do this will vastly improve your essays.
Use timelines. Even if your teacher doesn’t make it mandatory to know dates, you should understand the order that major events happen. I will either write out a timeline or order my cue cards in the order they belong in after studying. Also, if your teacher does mark dates, you can at least be sure you know the decade it happened in even if you don’t know the full year.
Write extremely thorough notes. In some classes, like math, if you get something really well, you can kind of relax on the depth of your notes. I do not recommend this in history! Write down everything that seems important: names, dates, symbols, fun facts. The more you know, the easier it is to get full marks on a test without bullshitting.
Don’t rely on crash courses or internet research while studying. Your teacher taught you what they want you to know. While watching a crash course video might be a good way to start preparing for a course while on summer vacation, it is not an effective way to study for a test. The information in the video is not what you were taught in class, so it won’t be that helpful. Internet research is the same – you can easily find dates and locations, but the specific information taught in class can only be found in your personal notes.
Talk to people in the class. Some things in history are open to interpretation. A good way to get lots of opinions and viewpoints on a certain subject is to hold a study group and discuss the material. You guys can also help each other remember small details from the notes. Certain things will just stick in your brain while others won’t, so reviewing the notes with other students is a really good way to make sure you aren’t missing anything.
Write essay outlines. In a history class, you will probably be writing a lot of essays. So many of my friends have massive problems with history essays because they don’t organize them prior to writing. If you just start talking about an event and don’t know where to go next, you’re going to have a total trainwreck. Organize your thoughts!! Plan what you are going to write!! It doesn’t take that long and it will save your life every time you write an essay.
Read “Politics and the English Langauge” by George Orwell.
Learn how to write footnotes manually. Writing footnotes and formatting your paper yourself isn’t that hard to do. It will help you out a lot when Word isn’t working or something goes wrong with the formatting feature.
Be an expert during presentations. If you are doing a presentation, be an absolute expert in the topic. Try not to read from any notes and be sure that you can answer any questions the class or teacher might have. Presentations are a good way to boost your mark, so try and be super knowledgeable and impress your teacher.
Learn how to write a thesis. If you’re writing an essay, your thesis should be clear. In high school, you can usually figure out what your thesis should be by figuring out what the main question you’re trying to answer is, then answering it. Make sure that your answer is focusing on just one viewpoint, not somewhere in the middle. And, ask a teacher or friend to look at your thesis before you start writing!
This is all I can think of for the time being, but I might add more later. Or message me if you have other ideas you think I should add to my list!
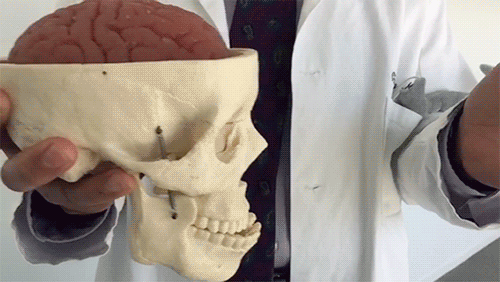
This fake brain actually has the same consistency as the real deal. So now you know how concussions happen!
A lot of people are turning to using tablets or laptops to take their notes, for reasons that I won’t go into in this post. But, while there are lots of posts about taking handwritten notes, there don’t seem to be very many about taking notes using a laptop/tablet (I’ll refer to as digital notes from now on).
Set up folders for each topic. Create these folders before lectures/class and save your notes into the correct ones. It will keep all of your notes organised and easy to find. You might want to have different folders for lecture and reading notes. Develop a system which is intuitive for you.
Know the program. Choose which program you’re going to use to take your notes. There are lots of options available, including Microsoft Office. If you can’t afford Office, then you can look into (illegal) free downloads of it. If you have Office, you could also use Onenote. Alternatives include free programmes like Evernote which allow you to access your notes from anywhere on any device.
Get a template (M Office only). On Microsoft word, you can download different templates. See if there is a template that you can use for taking your notes. Alternatively, you can create your own template by adjusting the margins, font, size, etc. and saving your preferences. If you don’t want to use a template, you can just use the default settings.
Name the notes. Make sure that you name the notes so that you know what’s inside. On Microsoft word, when saving documents you can add tags. Then you can search these tags for any documents with that specific tag. I’ve found this to be a really useful organisational tool.
Do you need anything to take your notes? If you’re using a tablet, you can buy Bluetooth keyboards which will connect and can be quicker than typing on the screen. You can also buy a stylus which will let you write like you would with a normal pen; some devices also have the option to convert your handwriting to typed notes.
Get to know your keyboard. If you’re using a keyboard, then I suggest looking at this website which will teach you how to touch type.
Become familiar with keyboard shortcuts. Especially for things like bold, italicise, underline, highlight.
Downloads. If the teacher/lecturer puts up any material for the lecture download it. These are typically powerpoint slides. When I take notes next year, I will download these and split screen between word and powerpoint. Then I’ll be able to copy and paste material and diagrams straight from the actual powerpoint, speeding up my process.
Back up. Please, back up your notes on google docs. If your computer crashes you will have a backup of your notes that will be essential to studying! Again, for the people in the back, back up your notes!
Creating your notes. Use the technology to your advantage.
Use bold/highlight/italic. Make your heading and subheadings stand out from the rest of your text.
Use bullet points.
You can even make sub bullet points (like this) using the tab key to follow your line of thought/reason.
Highlight the important things; you could even use different colours for different things. E.g. yellow for important dates, blue for important quotes.
Develop an annotation style. For example, sometimes you might fall behind a bit, and miss a detail. When this happens to me I insert a series of dots into my notes, like this (……..) and I know that means I missed something so I can return to the recordings to find out what I missed. You could use question marks (?) to indicate something that confuses you that you need to do more reading on. There are lots of different symbols so you can develop your own system.
This also works with words. If you have certain words which you’re typing a lot then you can make them shorter and easier to type. For example, the word “participants” comes up a lot in my course, but I use “ps” because it’s shorter and quicker to type.


i never used to do notes for any classes but this year i promised myself to put effort into making my notes look decent and it’s definitely a work in progress ✨

hi!!! i’ve seen lots of posts going around about how being a studyblr only means to have cute and expensive stationery and i know that lots of you don’t want or can’t spend that much money on stationery and i thought that doing your own stuff is waaaaay more fun and cheaper than buying it!!! (and it’s so original! no one will have the same notebook as you!) picture from here
dorm
dorm decor by @notquitenightingale
dorm room masterpost pt1 and pt2 by @studypops
46 cheap ways to decor your room
33 DIY ideas / 25 / 18
15 cute af ideas
16 even cuter ideas!!
10 DIY for lazy ppl
20 DIY DESKS!
stationery
school supplies pt1 and pt2 by @gracelearns
custom notebook covers by @studyquirk
make your own syllabible by @xannerz
map compositon book cover
pen loop! (rlly useful) by @studyingalpacas
make shift tabs by @vellichoristic
decorate white boxes! by @wodka-aunt
13 stationery ideas!
17 DIY projects
very very cute DIY
really nice DIY
10 DIY ideas
10 DIY pencil cases!!
20 backpack and pencil cases!!
15 pencil case tutorials
20 DIY pouches
super cute DIY pencil case
organize your binders
DIY cardboard binder
stylish af binders
11 DIY notebooks + another one!
17 cute ways to cover your books!
10 tutorials to make unique books!
15 ways to personalize your pens!
DIY calligraphy pens!
Flower pens!!!!!
+ my printables masterpost
treat yo self
25 relaxing spa ideas
so many face masks
a whole page on DIY beauty
17 DIY beauty products
50 DIY from pinterest!
27 hacks!!
10 DIY treatments
40 genius beauty hacks
+ my food masterpost

STUDY METHODS (part 1)
i’ll be posting soon part 2 (Study methods part 2 here)
*Please excuse my english if necessary*
Puedes encontrar esta misma imagen en español aquí

OKAY GUYS LISTEN UP so there’s this website called slader.com and it has EVERY FUCKING ANSWER TO EVERY TEXTBOOK EVER. It has answers AND shows you ALL the work so you can understand it (or be a slacker). This website has literately saved my calculus grade. It even has free tutors if you need the extra help. Guys, it’s free to register and it will save your life
How to Take Notes: from a Textbook
(Be sure to change the post type from link to text post when you reblog, if that’s what you want to do)
This method is best suited for textbook or article notes, and is a version of revised notes. It is also well suited for books you plan on returning to the bookstore or books you have rented, as it does not involve writing directly in the book itself.
First, you’ll need to find a notebook, and the pens you like the best. My favorite notebooks to work with for note-taking, especially for my “revised” notes, are the Moleskine, hard or soft cover, in size extra large. For this specific class (Intro to Gender and Women’s Studies), I decided that lined pages would suit my needs better. For my math, engineering, and science classes, I usually opt for squared paper, as I draw in lots of diagrams and graphs.
My favorite pens ever are Staedtler Triplus Fineliners, so even though they show through the pages a little bit, I still choose to use them. I just love the way they write. I usually write out my notes themselves with a Pilot G2 05 with black ink, as it writes with a finer line and doesn’t bleed through quite as much.
I usually try to set up my notebooks about a week or so before class starts, that way it’s ready to go on my first day of class.

You’ll want to start off by setting up your notebook. On my first page, I put my course code for my university, as well as the course title.

Next, and this is perfectly optional (I just like the way it makes the book look, especially at the end of the semester), I include some sort of related quote to the course. For my engineering courses (which are related to my major), I put a different quote at the beginning of each section. But as this is a two-month long course during the summer, I opted for one quote by Mohadesa Najumi at the beginning of my book.

Next I set up my table of contents and include a page with basic course information. As this course is all online, my course information just included the start and end dates of the course, what time content is posted and on what day, and the name of my professor. For my usual courses, I will include the days of the week the class meets on and where, TA names and contact info, as well as posted office hours for my professors and TAs and tutoring hours either in the library or in the College of Engineering.

Next is one of the things I’m most proud of.
While I religiously use my Erin Condren planner to map out my days, weeks, and months, I have found throughout my college experience that including monthly views for the months my class ranges has been helpful. This way, there’s no sifting through the multiple colors I have in my planner, and everything related to that class is in the same notebook.
On this calendar I include start dates of the class, the end date, the dates of exams or quizzes, assignment deadlines, office hours, etc.
For this course, as I just started a few days ago, I don’t have a lot of dates or information, so my calendars are still very empty.


Next up I go to my weekly overview. At the beginning of each week, I set up a weekly layout, and I include a list of assignments, tests, quizzes, tasks, projects, etc that need my attention throughout the week, and I place the days I plan on doing them or the days they need turned in onto the weekly layout.

Now you’re finally ready to get into taking the notes.
Gather your book, some sticky notes, and your favorite pen or pencil.
I color code my stickies so that the “revision” process later goes a bit smoother. In this case, I’m using blue to denote something interesting, intriguing, or thought provoking, greenish-yellow to represent the facts or important concepts, and pink for important vocabulary words and their definitions.

Read the selection once.
As you read along the second time, write notes on your stickies, and place them in a place of relevance directly on the page in the book. Just make sure you don’t cover up anything you need to keep reading.


Now, once you’ve read all the material in questions (you can choose to break it up however you want, but since Chapter 1 was assigned for the week, I’ve elected to break it into chapters), carefully remove your stickies one by one and lay them out on a flat surface. This is when having a separate color for vocab can be helpful, as I sometimes put all of my vocab at the beginning or end of a section, especially if the section of reading was particularly large.
Organize your stickies in an order that makes sense to you, and use this order as your basis for transferring those notes into your notebook. The order you choose can just be lumping them under similar headings. Some classes even lend themselves to a nice chronological order. Whatever you choose, just make sure it’s something that will make sense to you when you come back to it in the end.

Okay so up there I wasn’t following my own advice, I just thought I would include the picture because my handwriting looks nice…

Now organize the stickies!

Now you just start writing everything from the stickies into your notebook. I like to take each category or subgroup and put them in the book on the facing page, then put them back in my textbook as I finish with each post it.

Moving on to the next category.


Before you know it, you’ve written all of your stickies into your notebooks.

Now you’re revved up and ready to go. You can either keep going and make a note summary page (which I’ll show you next week), or you can leave it. These will also be helpful when reviewing for tests and quizzes. You can highlight or underline, or use even more stickies (which is what I usually do) as you review.
Well, that’s all I have for you right now. Happy studying!
(To view this post on wordpress, click here)
-
 drwilsonbutt liked this · 6 years ago
 -
 westendmusicalphan liked this · 6 years ago
 -
 laurenxxaustinx99-blog reblogged this · 7 years ago
 -
 yoongisatoori liked this · 7 years ago
 -
 xamelia-colleyx-blog liked this · 7 years ago
 -
 kewllkid-blog liked this · 7 years ago
 -
 shelovestinia liked this · 7 years ago
 -
 completerandomlife liked this · 7 years ago
 -
 hotchsluvr liked this · 7 years ago
 -
 444-cloud liked this · 7 years ago
 -
 sadtavros-blog liked this · 7 years ago
 -
 annoyingtastemakerpeanut-blog liked this · 7 years ago
 -
 libbysaurus liked this · 7 years ago
 -
 guilhermkf reblogged this · 7 years ago
 -
 soft-loft liked this · 8 years ago
 -
 chanelforkarl liked this · 8 years ago
 -
 eun-ji-fan-blog liked this · 8 years ago
 -
 hopefandomsokay liked this · 8 years ago
 -
 napstamoth24-blog liked this · 8 years ago
 -
 thesecrethistoryofbisexuals liked this · 8 years ago
 -
 hermionegrangerislifegoals reblogged this · 8 years ago
 -
 victoriamayee-blog liked this · 8 years ago
 -
 bizarrecancerfilledchick-blog reblogged this · 8 years ago
 -
 bucket-senpai liked this · 8 years ago
 -
 admirablegranger liked this · 8 years ago
 -
 ummwild liked this · 8 years ago
 -
 lex2009 liked this · 8 years ago
 -
 happyinmylittleabubble reblogged this · 8 years ago
 -
 princessplaytips-blog liked this · 8 years ago
 -
 mystationeryaddiction-blog reblogged this · 8 years ago
 -
 note-s reblogged this · 8 years ago
 -
delightfullycrookeddream reblogged this · 8 years ago
-
abbiej45 reblogged this · 8 years ago
-
abbiej45 liked this · 8 years ago
-
 themoviewatcher2 reblogged this · 8 years ago
 -
themoviewatcher2 liked this · 8 years ago
-
 dabbyoxo-blog liked this · 8 years ago
 -
 nefarious-gemini liked this · 8 years ago
 -
 astrostargirl liked this · 8 years ago
 -
 sodiroulla-blog liked this · 8 years ago
 -
 for-eva-studying-blog liked this · 8 years ago
 -
favofficesupplies reblogged this · 8 years ago
-
brustudy-blog liked this · 8 years ago